Get your home ready for a hassle-free flooring installation with these expert tips. Learn how to clear space, check your subfloor, and ensure a smooth installation process.
Installing new flooring is an exciting home improvement project, but preparation is key to ensuring the process goes smoothly. Whether you’re getting hardwood, vinyl, tile, laminate, or carpet, taking the right steps before installation day can help prevent delays and ensure the best results.
This guide will walk you through everything you need to do to get your home ready for a flooring installation.
1. Clear the Space for Installation
Before the installers arrive, remove all furniture, rugs, and personal items from the area. This includes:
- Sofas, tables, and chairs
- Area rugs and floor mats
- Electronics and décor items
- Curtains or anything touching the floor
If moving heavy furniture is a challenge, check with your flooring company to see if they offer furniture-moving services.
Why This Matters:
A clear workspace allows installers to work efficiently and reduces the risk of damage to your belongings.
2. Remove Old Flooring (If Necessary)
Depending on the type of flooring you currently have, you may need to remove it before installation. Some flooring companies handle removal, while others may require you to do it beforehand.
- Carpet – Remove the carpet, padding, and tack strips.
- Tile – Tile removal can be messy, so professional removal may be best.
- Hardwood or Laminate – These may be easier to remove, but check for subfloor damage underneath.
Pro Tip:
Ask your installer whether they handle old flooring disposal or if you need to arrange for it.
3. Check the Condition of Your Subfloor
A stable, level subfloor is crucial for a successful installation. Before laying new flooring, inspect your subfloor for:
✔ Uneven areas
✔ Cracks or holes
✔ Moisture damage
If your subfloor is damaged, it may need repairs before new flooring can be installed. Skipping this step can lead to problems like creaking, warping, or an uneven surface.
4. Control Dust and Debris
Flooring installation, especially wood and tile, creates dust. To keep your home as clean as possible:
- Cover vents to prevent dust from circulating.
- Seal off rooms with plastic sheeting to contain debris.
- Move delicate items like electronics and artwork to avoid dust exposure.
Important:
If you have allergies or respiratory issues, plan to stay out of the work area during installation.
5. Ensure Easy Access for Installers
Make sure flooring installers have a clear path to bring in materials and tools. This includes:
- Keeping driveways and walkways clear for delivery trucks.
- Ensuring hallways and entryways are free of obstacles.
- Keeping pets and children in a safe area away from the work zone.
Why This Matters:
Having clear access helps installers work faster and prevents accidents.
6. Plan for Noise and Disruptions
Flooring installation can be loud, and depending on the size of the project, it may take several days. If you work from home or have small children, consider planning around the noise.
Options to reduce disruption:
✔ Use noise-canceling headphones if you’re working at home.
✔ Keep pets in a quiet room or arrange for pet care.
✔ Schedule installation when it’s least disruptive for your household.
7. Confirm Measurements and Materials Before Installation
Before installation day, verify that you have the right materials and the correct amount of flooring. Double-check:
- The flooring type and color match your order.
- The square footage covers your space.
- Any necessary underlayment or adhesives are included.
Mistakes in materials can lead to delays and additional costs, so review everything in advance.
8. Understand the Installation Timeline
Different flooring types have different installation times:
- Hardwood – May take several days, plus additional time for finishing.
- Tile – Needs time for adhesive and grout to dry.
- Vinyl or Laminate – Can often be installed in one day.
- Carpet – Typically completed in a day but may require stretching time.
Ask your installer about:
✔ How long the installation will take
✔ Whether any materials need curing time before use
✔ When you can safely walk on your new floors
9. Plan for Waste Disposal and Cleanup
Installing new flooring generates waste, including old flooring, packaging, and leftover materials. Some companies offer cleanup, but others may leave disposal up to you.
Ask in advance:
✔ Will the installers remove old flooring?
✔ Do they handle waste disposal?
✔ Should you rent a dumpster for larger projects?
Having a cleanup plan in place makes the process easier once installation is complete.
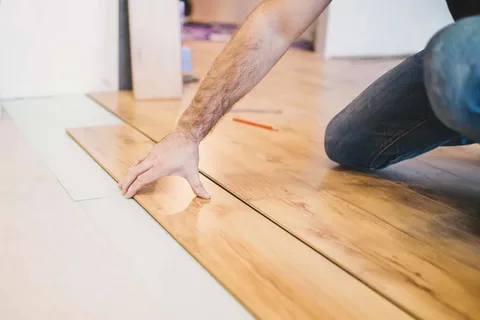
10. Perform a Final Walkthrough
After installation is finished, do a final inspection with your flooring contractor to ensure everything looks right. Check for:
✔ Even seams and properly fitted boards or tiles.
✔ No visible gaps, cracks, or loose edges.
✔ Properly installed transitions between rooms.
If anything seems off, bring it up with the installer before they leave to get it fixed immediately.
Final Thoughts
Properly preparing your home for flooring installation ensures the process goes smoothly and helps you get the best results. By clearing the space, checking the subfloor, and planning for potential disruptions, you can enjoy a stress-free installation experience.
Ready for new floors? Contact a trusted flooring installer today to get started!